Edit action buttons on my website
Action buttons let customers contact you, pay you, schedule an appointment or jump straight to a section on any page of your website—or any other site. You can also use action buttons to feature product categories (like featured products or new arrivals).
- Go to your GoDaddy product page.
- Scroll down, expand Websites + Marketing and select Manage next to your site.
- Select Edit Website to open your website builder.
- Go to the section with the action button, or add a section with an action button.
Note: If you have GoDaddy Payments, you can add a Get Paid section that connects action buttons to pay links you've created. Many other sections can also include action buttons. Introduction or Content sections will help highlight an action button.
- Select an existing action button in the section.
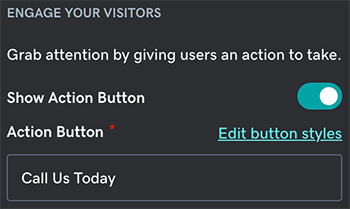
- In the right panel, next to Show Action Button, select the toggle to turn it on (or off).
Note:
- If there's more than 1 button, first select the button you want to edit.
- If all the buttons in that section are disabled, select anywhere in the section and then, in the right panel, select Pay or Action Button to reveal the hidden buttons.

- Edit the button text. We recommend using strong action words to grab attention and using no more than 25 characters, if possible.
- Select Link or Take Payments to choose what happens when a visitor clicks the button.
- Link: Directs visitors to any page, URL, phone number, email address or product (for e-commerce websites). From the Link to dropdown list, select:
- Page: Select any page on your website, and even jump visitors to a specific section on that page. When they select the action button on your website, they'll be taken to the new page.
- Website URL: In the Website URL box, enter the destination URL (like coolexample.com). When visitors select the action button on your website, they'll be taken to the destination URL in a new browser tab (your website will remain open in their browser).
- Phone: Select your area code from the dropdown list and then enter your phone number in the text box. When visitors select the action button on your website from their mobile device, their calling app will open with your number, and they can call you.
- Email: Your email address will be prefilled as the recipient, and you can add a subject line and a message, if desired. When visitors select the action button on your website, they'll be asked to open their default email client to start a new email message. Your email address will be prefilled as the recipient.
Note: Certain browser add-ons or settings could suppress this action.
- Products: If you have an e-commerce site with products added, use the Categories dropdown list to direct a visitor to a specific product category.
- Take payments: Create an Online Pay Link and connect it to this button.
Note: To use Online Pay Links you need a GoDaddy Payments account.
- Link: Directs visitors to any page, URL, phone number, email address or product (for e-commerce websites). From the Link to dropdown list, select:
- Your changes are saved automatically. Use Preview to see the results, and when you're ready to make the changes public, publish your site.