Move my site from WordPress.com
Warning: For this process to work, your WordPress.com site must still be active when you import the XML site file.
If you're moving a WordPress site from WordPress.com, you'll need to follow special instructions to ensure you get all your content. You can use the built-in WordPress export tool to download an Extensible Markup Language (XML) file containing all the information needed to import your site into your new hosting location.
Note: The WordPress export tool will not work for sites with an extensive media library, or an online store (WordPress.com Business, Commerce, or Enterprise plans). These sites will need to be migrated manually or with a plugin.
Required: Before you export the content of your WordPress.com site, you should:
- Set your site to public in Settings, under General. Otherwise, your images won't transfer.
- Review your comments for spam and delete them. You should also take the time to approve or delete any pending comments.
- Clean up your site as much as possible by removing any draft pages and posts you're not using.
Export your site from WordPress.com
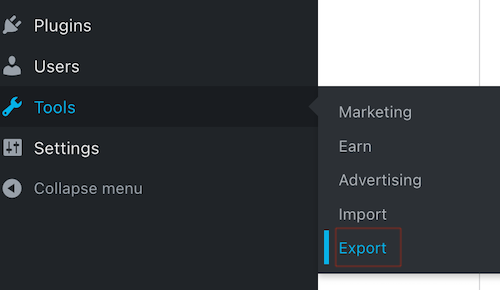
- Sign into your WordPress.com dashboard.
- From the left-side menu, select Tools and then Export.
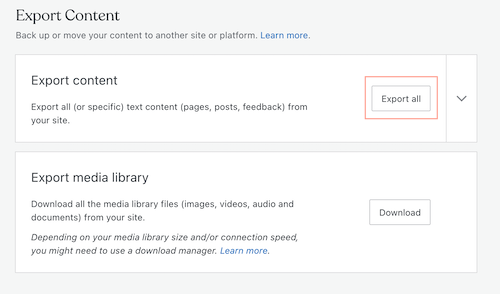
- Under Export Content, select Export All. Then, when this option appears, select Download (this will also send a download link to your email).
 Note: The export tool will move your images and other media. It's important to understand that this export doesn't contain those media files. Instead, it has links to your media files and will import the content after you import the XML file.
 - Find the file you downloaded, and then unzip the file (Windows | Mac OS).
- (Optional) Export your media library by selecting Download under Export media library.
Note: It's important to understand that this media cannot be imported directly into another WordPress site (learn more about this export option).
Import your WordPress.com site
Now that you have the XML file for your WordPress site, it's time to import it!
- Sign into your new WordPress site.
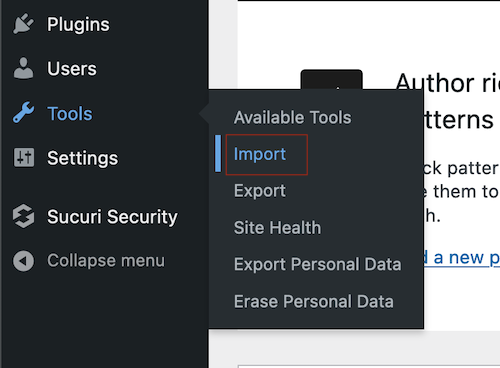
- From the left-side menu, select Tools and then Import.
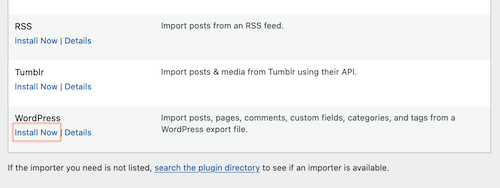
- Under WordPress, select Install Now.
- Once the Importer finishes installing, select Run Importer.
- Select Browse and then find the file you downloaded and unzipped.
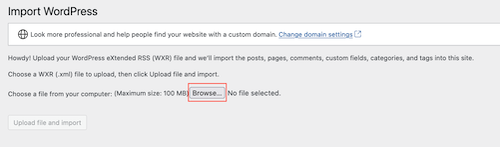
- Select Upload file and import.

- (Optional) Assign Authors: You can assign a new or existing author during import.
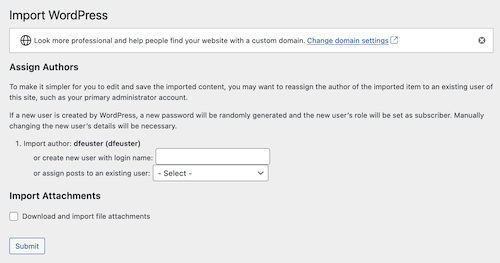
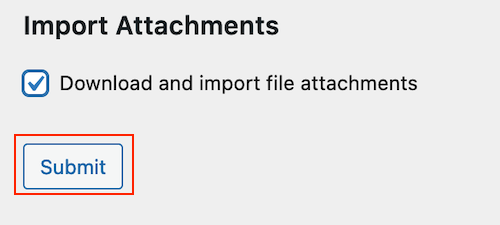
- (Optional) Import Attachments: You can import your file attachments.
- Select Submit.
Congratulations! You've successfully imported your WordPress.com site! You may need to update your navigation if you're overwriting an existing site.
Related steps
- If you're moving a site with subscribers, you'll need to use the Subscription migration tool.
- If your new site is ready to go live on your old domain or a new one, you can change your domain. If your site is on Managed Hosting for WordPress, follow these directions to change your domain.
More info
- Review this process in the official documentation at WordPress.com.
- Review this process in the official documentation at WordPress.org.