Редагування списків безпечних і заблокованих відправників
Примітка. Розширений захист електронної пошти доступний лише англійською мовою. Хоча статті довідки доступні вашою місцевою мовою, інтерфейс продукту, функції та результати викладені виключно англійською мовою.
Ви можете визначити, який електронний лист надсилатиметься на карантин, додавши конкретну адресу електронної пошти, домен або IP-адресу до списку дозволених або списку блокування. Електронна пошта від дозволених відправників не надходитиме до карантину, тоді як електронна пошта від заблокованих відправників - не.
- Увійдіть на свою сторінку Розширеного захисту електронної пошти GoDaddy (використовуйте ім’я користувача та пароль GoDaddy).
- Виберіть Вхід до Advanced Email Security . Відкриється сторінка входу.
- Введіть свою адресу електронної пошти, виберіть Вхід , а потім Вхід за допомогою Microsoft .
- Виконайте вказівки на екрані, щоб увійти за допомогою своєї адреси електронної пошти Microsoft 365 та пароля. Відкриється портал Advanced Email Security.
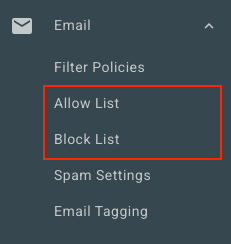
- У крайньому лівому куті виберіть Електронна пошта . Залежно від того, чи потрібно додавати відправника до списку дозволених або списку блокування, виберіть один із наведених нижче варіантів.
- Дозволити список : Виберіть Дозволити список . У верхньому правому куті виберіть Додати дозволений запис .
- Блокувати список : виберіть Блокувати список . У верхньому правому куті виберіть Додати блокування запису .

- У розділі Дозволити або Заблокувати наступне введіть адресу електронної пошти, домен або IP-адресу. Відокремте кожного відправника комою або крапкою з комою, або введіть її в новому рядку.
- Натисніть кнопку Зберегти.
Змінити списки дозволів і блокування для всіх користувачів
Якщо ви адміністратор, ви можете переглядати та редагувати списки дозволених і заблокованих для всіх користувачів організації.
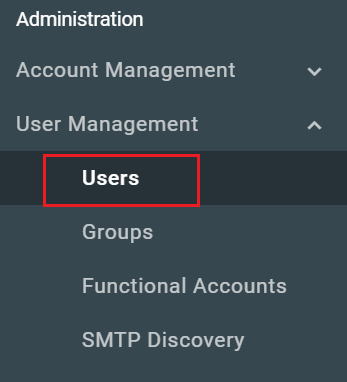
- У лівій частині виберіть Керування користувачами , а потім Користувачі .

- Виберіть ім’я / адресу електронної пошти користувача, якого потрібно змінити.
- Угорі сторінки виберіть пункт Дозволити список або Блокувати список залежно від того, який список потрібно редагувати.
Ви можете переглянути та змінити список кожного користувача, повторивши ці кроки.