Connect GoDaddy Conversations to my Gmail account
Forward your Gmail account to GoDaddy Conversations to receive all your Gmail messages in your Conversations unified inbox, making it easier to manage your business communications.
Watch the video and follow the step-by-step instructions further down to connect Conversations to your Gmail account.
- In a web browser, go to your GoDaddy product page.
-
If you have the standalone version of Conversations, expand Conversations Unified Inbox. To the right of your Conversations plan, select Web Inbox.
OR
If you have a Websites + Marketing plan, scroll to Websites + Marketing and select Manage next to your site. In the left menu, expand Conversations.
- Select Settings.
- Select Email, and then select Connect Email or Connect an Email.
Note: If you have a Websites + Marketing plan and have enabled chat for your website, you’ll have a default email address to receive chat notifications. This is an internal email address created for you by GoDaddy. Connecting Gmail to Conversations will not affect this default email address.
- Select Gmail and then select Next.
- Enter the Gmail address you want to connect to Conversations and select Next.
- Enter the name your customers will see when you send them an email and select Next.
- Select Open Gmail Settings.
- A new tab will open, showing your Gmail settings.
Warning: Make sure you keep both tabs open because you’ll need to switch between them to be guided through the steps.
- Go back to the Conversations tab and select Copy next to the forwarding address.
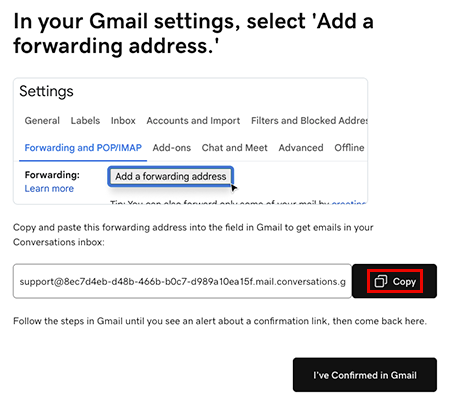
- Go to the Gmail settings tab. Under Forwarding and POP/IMAP, select Add a forwarding address, paste the address into the text box and select Next. You may need to confirm that it’s you. Follow the on-screen prompts to do this.
- You’ll get a message saying a confirmation link has been sent to the email address you entered. Select OK.
- Back in the Conversations tab, select I’ve Confirmed in Gmail, and then select Confirm Forwarding in Gmail.

- A new tab will open, showing a Gmail confirmation. Select Confirm. When you see the Confirmation Success! message, you can close this tab.

- Go to the Gmail settings tab and reload the page.
Warning: If you don’t reload the page you might not see the option to select Forward a copy of incoming mail.
- Under Forwarding and POP/IMAP, make sure Forward a copy of incoming mail is selected. At the bottom of the page, select Save Changes.
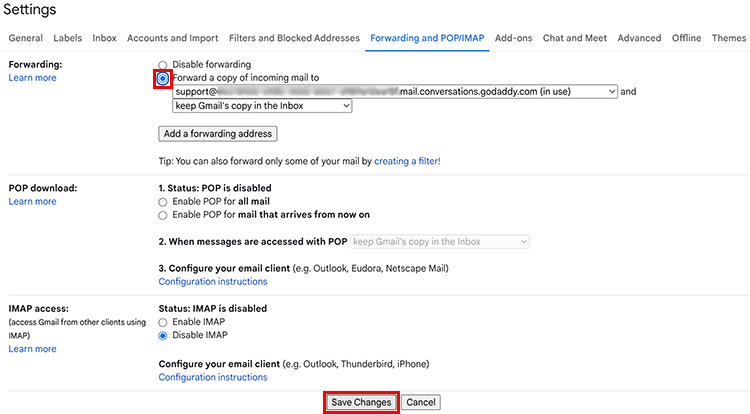
- You’ll be taken to your Gmail inbox. At the top of the page you’ll find a message saying you’re now forwarding your email.

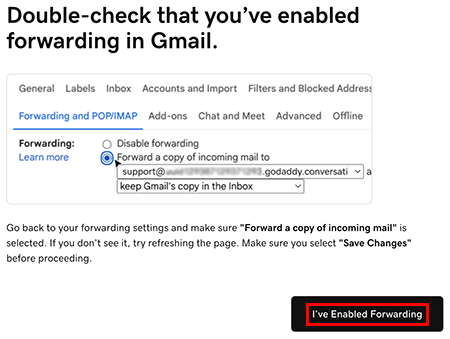
- In the Conversations tab, select I’ve Enabled Forwarding.
- A message will let you know you’ve successfully set up email forwarding. It could take up to 5 minutes for this message to show. Select Sign in with Google to start the process of making sure you can also reply to Gmail messages from Conversations.
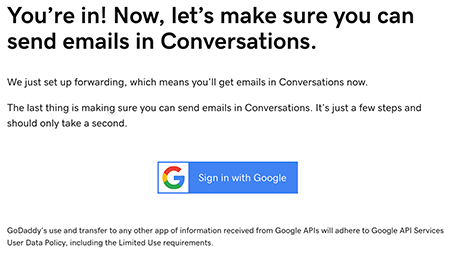
- Sign in to the Gmail account you connected to Conversations and select Continue.
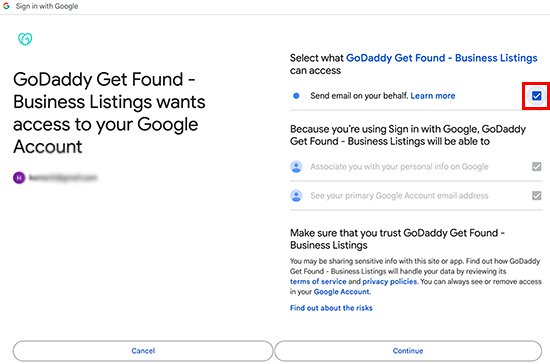
- Make sure Send email on your behalf is checked and select Continue.
- In your Conversations recent messages you’ll find an email confirming that forwarding has been set up.
You’re all set! You can now use your Conversations unified inbox to manage all your Gmail messages, along with messages from the other channels you connect to Conversations.