Add products to the catalog (In Person page)
Add products directly through the GoDaddy Payments Dashboard in your web browser, either in a batch or individually. Once added, associate the products to your GoDaddy Smart Terminal catalog. All added or imported products will be available automatically in the GoDaddy Commerce app – no additional action needed.
The steps below cover how to add products through the original In Person overview of the GoDaddy Payments dashboard. If you’re using the updated dashboard (displays Catalog in the left-nav instead of the top-nav), check out our info for adding products in the updated web browser dashboard.
Add multiple products at once with the bulk upload tool.
If you have a Managed Hosting for WordPress, Managed Ecommerce for WordPress or Managed Hosting for WooCommerce store, you can create a CSV file with all of your products directly from within your store, then bulk upload them into your GoDaddy Payments catalog.
- Sign in to your In Person Overview page (use your GoDaddy username and password).
- Select Catalogs, and then Products.
- Select Bulk Upload. You'll see two sample product .csv files. One is optimized for products with modifiers (for example, different sizes), and the other is better suited for products without modifiers.
The Smart Terminal can display up to 500 products in the on-device catalog. If you have more than 500 products, make sure to include a UPC value for your products so you can add them to orders with the built-in barcode scanner.
- Download the file template that best suits your needs. Fill out the fields and save the file to your computer.
- Select Upload file or Click to upload to add the products to your inventory from the file.
- To use the products on your Smart Terminal, create a product catalog if you haven’t already.
- To bundle similar products together (for example, Appetizers or Entrees), select Add category from within your product catalog. Add a Name and Color, then Save. You can add products within a category or to the main page of the catalog.
- From within the product catalog or category, select Add product.
- A list of your products will appear. Select each product that you want to include in the catalog.
- On the Smart Terminal, refresh the Register app to sync your catalog changes. Open the Register app, tap the menu on the upper left-hand side (next to Sale), then tap Refresh Register.
Manually enter individual products through the web browser.
- Sign in to your In Person Overview page (use your GoDaddy username and password).
- Select Catalogs, and then Products.
- Select Add products.
- Enter a Name, Price, SKU and UPC (optional). If you want to enter a custom price during each transaction, turn on the Custom Price toggle.
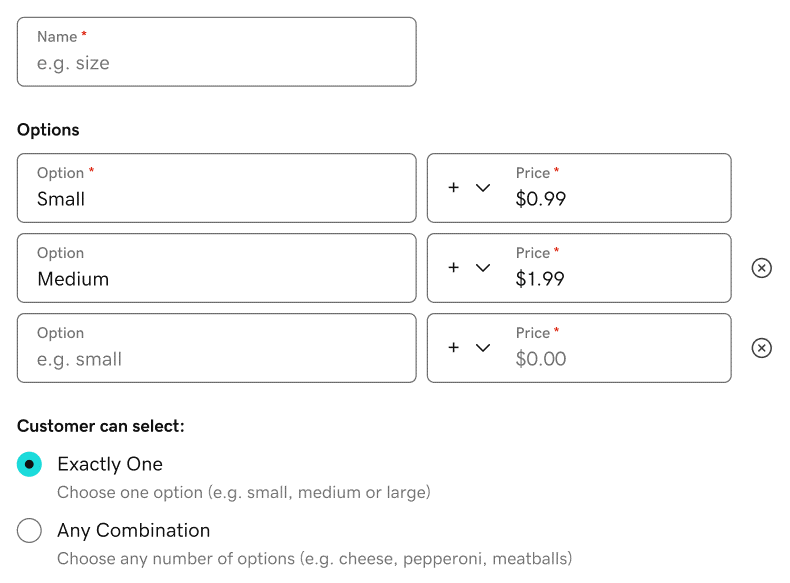
- To customize the product price (for example, add different sizes), select Add modifier. Add a Name and adjust the Options fields, then select Add to Product or Save modifiers.
- When you’re finished adding products, select Save to add the products to your inventory.
- To use the products on your Smart Terminal, create a product catalog if you haven’t already.
- To bundle similar products together (for example, Appetizers or Entrees), select Add category from within your product catalog. Add a Name and Color, then Save. You can add products within a category or to the main page of the catalog.
- From within the product catalog or category, select Add product.
- A list of your products will appear. Select each product that you want to include in the catalog.
- On the Smart Terminal, refresh the Register app to sync your catalog changes. Open the Register app, tap the menu on the upper left-hand side (next to Sale), then tap Refresh Register.
More info
- Review best practices for maintaining your product catalog.
- Check out additional ways to add products to your product catalog.
- Create an order on the Smart Terminal.