Migrate a WordPress site with a plugin
Moving your website? Get expert migration Help.
Required: You can save time and avoid possible troubleshooting difficulties by doing the following before you start migrating/cloning your WordPress site:
- Update your plugins and theme to the most current version.
- Update your WordPress version to the most current one.
- If possible, the PHP version of the destination site's hosting should match what your source site is running on (PHP 7.4 - 8.1 are available on our Linux Hosting and WordPress Hosting plans).
- Consider checking your source website for malware infection. This option is available once you add the source site to your ManageWP dashboard.
ManageWP offers a hassle-free and secure solution to migrate your WordPress site. This plugin-based method allows you to transfer your site without needing FTP or database access, making it a convenient option for moving your WordPress site. Here's how to get started.
- Install the ManageWP Worker plugin in your source and destination WordPress site.
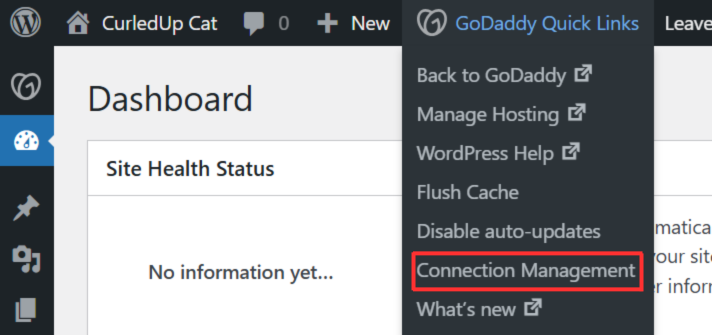
Note: Managed Hosting for WordPress plans already have the Worker plugin installed and activated. In this case, you do not need to install the ManageWP Worker plugin, and you can find the Connection Management under Managed Hosting for WordPress.
- Sign in to your ManageWP dashboard. If you don't already have an account, sign up for an account.
- Add your source and destination WordPress sites to the ManageWP dashboard.
- In your WordPress dashboard, locate the ManageWP Worker plugin in your plugins list. Select the Connection Management link and copy the connection key.

- In your ManageWP dashboard, select
 Add Website in the upper left corner of the page. Enter the URL of the website you're adding, then select connection key instead, add the connection key, and then select Add website.
 - Do this for both the source and destination WordPress sites.
- In your WordPress dashboard, locate the ManageWP Worker plugin in your plugins list. Select the Connection Management link and copy the connection key.
- Once your source and destination sites have been added to the ManageWP dashboard, select the source site.
- (Optional) If you're moving a commerce site, we recommend putting your site into maintenance mode before moving it. This will prevent any lost orders that may be processed during a migration.
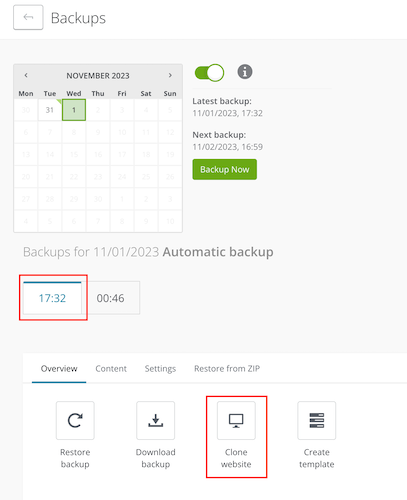
- Select Backups, then Activate Backups, and then Activate. Wait for the first backup to be created.
- Select an existing backup and then select Clone website under the Overview tab.
- Under Choose destination type, select Existing website in ManageWP.

- Select the destination website from the list.
- (Optional) You can create a new admin user during the cloning process.
- (Optional) You can adjust the Search engine visibility for the destination site. The options are Do not change (default), Enable, or Disable.
- Select Clone.
This process may take some time, based on the size of the website you're cloning. Once the operation finishes, you should sign into your destination site and make any necessary adjustments.
Note: If you are having trouble with the ManageWP Worker plugin, you can reach out to the developers directly.