Eksporter eller sikkerhetskopier kontakter, kalender, e-post og oppgaver
Merk: Disse instruksjonene er kun en referanse. Våre GoDaddy-guider kan ikke hjelpe deg med å eksportere data.
Opprett en sikkerhetskopifil i Outlook for å lagre og eksportere e-postmeldinger, kontakter, kalenderinformasjon og oppgaver. Deretter importerer du sikkerhetskopieringene til en ny e-postplan, e-posttjeneste eller en ny versjon av Outlook. Eksporten vil ikke inneholde metadata som mappeegenskaper (visninger, tillatelser og innstillinger for automatisk arkivering), meldingsregler og lister over blokkerte avsendere. Merk deg at Microsoft ikke lenger støtter versjoner av Outlook som er eldre enn 2016.
Påkrevd: For å sikre at hele postboksen eksporteres, må du deaktivere bufret Exchange-modus, ellers vil eksporten bare omfatte de siste 12 månedene.
Velg riktig fane basert på e -postplattformen du bruker.
- Logg på Outlook på Internett. Bruk e-postadressen og passordet for Microsoft 365 (brukernavnet og passordet for GoDaddy fungerer ikke her).
- Helt til venstre på siden velger du
 Personer.
 - Velg Administrer kontakter og Eksporter kontakter.
- Velg om du vil eksportere alle kontakter eller bare kontakter fra en spesifikk mappe, og deretter velger du Eksporter.
Kontaktene dine vil lagres som en .csv-fil, som du kan importere til andre e-postapper (som Gmail) eller andre versjoner av Outlook.
- Åpne Outlook.
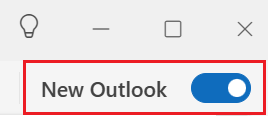
- Hvis du er i nye Outlook, går du tilbake til klassisk Outlook. I øvre høyre hjørne deaktiverer duNye Outlook. Du må kanskje bekrefte at du vil tilbakestille.

- Velg Fil oppe i det venstre hjørnet.
- Velg Åpne og eksporter og Import/eksport.
- Velg Eksporter til en fil og Neste.
- Velg Outlook-datafil (.pst) og Neste.
- Hvis du vil eksportere hele innboksen, velger du navnet på e-postkontoen og deretter fortsetter til det neste trinnet. Eller, hvis du bare vil eksportere kalenderen, kontaktene eller oppgavene, velger du mappen du ønsker å eksportere. Du kan kun eksportere én type om gangen, så du må gjenta disse trinnene hvis du vil eksportere kontakter, kalendere og oppgaver individuelt.
- Ved siden av Inkluder undermapper må du sjekke at avmerkingsboksen er valgt, og deretter velge Neste.
- For å velge hvor du vil lagre Outlook-datafilen (.pst), velger du Bla gjennom. Angi et filnavn, og velg OK.
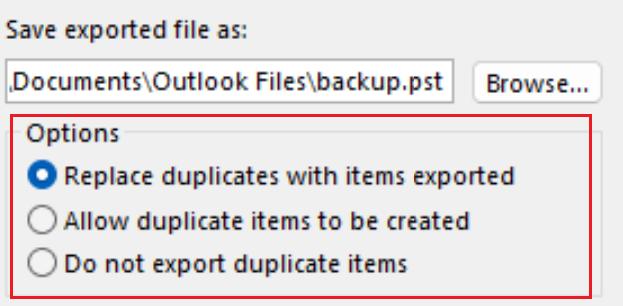
- Hvis du eksporterer til en eksisterende Outlook-datafil (.pst), angir du hva som skal skje når du eksporterer elementer som allerede finnes i filen, under Alternativer.

- Velg Fullfør.
- Eksporten starter umiddelbart med mindre et av følgende skjer:
- Når dialogen Opprett Outlook-datafil vises, angir du et passord i Passord og Bekreft passord, og velger deretter OK. Hvis du vil fortsette uten å konfigurere et passord, lar du passordfeltene stå tomme og velger deretter OK.
- Hvis du eksporterer til en eksisterende Outlook-datafil (.pst) som er passordbeskyttet, angir du passordet i Passord for Outlook-datafil-dialogen og deretter velger OK.
- Åpne Outlook.
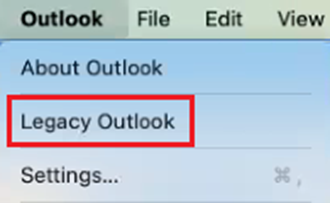
- Hvis du bruker den nye versjonen av Outlook, går du tilbake til forrige versjon. Velg Outlook, og deretter Gammel Outlook. Du må kanskje bekrefte at du vil tilbakestille.

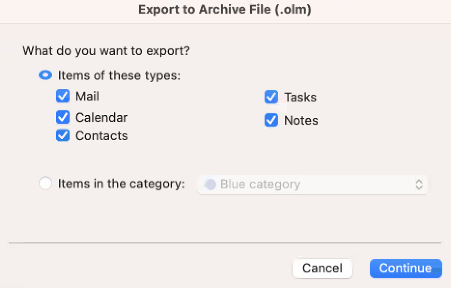
- Velg Fil og Eksport. Vinduet Eksporter til arkivfil (.olm) åpnes.
- Hvis du ikke ser Eksport, må du velge Verktøy, og deretter Eksport i stedet.
- Velg hva du vil eksportere. Som standard er alle elementer valgt.
- Hvis du vil eksportere noen av disse typene enkeltvis, merker du av i avmerkingsboksen ved siden av hvert element.

- Velg Fortsett .
- Velg hvor på datamaskinen du vil lagre filen, og angi et filnavn. Velg deretter Lagre. Elementene dine blir eksportert.
- Velg Fullfør.
Relatert trinn
- Nå som Outlook-dataene dine er eksportert i en sikkerhetskopieringsfil, kan duimportere den til Outlook.
Mer informasjon
- Finn ut hvordan du eksporterer en kalender til en .ics fil fra Microsoft.
- Se mer om å eksportere og importere filer i Outlook fra Microsoft.
- Sjekk ut denne artikkelen fra Apple for å finne ut hvordan du importerer eller eksporterer innbokser i Apple Mail på Mac.