Skapa blogginlägg
I ett blogginlägg skriver du innehåll baserat på ett ämne eller nyckelord, formaterar det och lägger till ett foto. Allt som återstår är att publicera nu eller schemalägga det för senare tid. Är du osäker på vad du ska säga? Utkast till versioner sparas automatiskt, så det är bara att skriva ner en snabb idé och avsluta den när du är klar. Kom ihåg att lägga till ett bloggavsnitt på din webbplats för att visa inläggen.
Den här videon är en del av instruktionsvideor för Använda en blogg för ditt företag .
- Gå till din GoDaddy- produktsida .
- Rulla ner, expandera Websites + Marketing och välj Hantera bredvid din webbplats.
- På kontrollpanelen expanderar du Marknadsföring och väljer sedan Blogg .
- Välj Skapa inlägg .
- Du kan välja att låta artificiell intelligens (AI) skapa ett inlägg åt dig eller skapa ett inlägg själv.
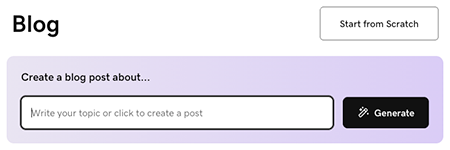
Så här låter AI skapa ett inlägg åt dig:
- Ange ett ämne eller en kort beskrivning för att vägleda vad blogginlägget handlar om, eller välj helt enkelt Generera för att låta AI skapa ett inlägg baserat på vad det vet om ditt företag.
- AI skapar ett blogginlägg och visar det som du kan förhandsgranska. Använd chattgränssnittet för att göra ändringar, om det behövs, eller välj Redigera under förhandsgranskningen av blogginlägget för att manuellt redigera inlägget.
Om du vill skriva ett inlägg själv väljer du Starta från början och följer dessa steg:
- Börja med titeln. Det ska innehålla ditt nyckelord och ge läsarna en uppfattning om den nytta de får av att läsa din artikel. Din titel måste vara mindre än 65 tecken.
- Lägg till brödtexten. Skriv i en konversation och använd rubriker för att skilja på idéer. Markera text för att formatera och länka den.
- Med markören i textområdet väljer du
 lägg till för att lägga till bilder, video eller en avdelare . Lägg till en stockbild eller video, eller någon av dina egna bilder eller videoklipp. Lär dig mer om att skapa en professionell bild .
 - Lägg till din aktuella bild. Det kommer att visas i ditt inlägg och i bloggsektionen på din webbplats.
- Välj en kategori eller lägg till en ny. Med kategorier kan du skapa flera bloggar på din webbplats.
OBS! Om du vill ta bort en avdelningsrad markerar du linjen och trycker på bakåt- eller ta bort -tangenten på tangentbordet. - Välj Publicera nu för att publicera ditt blogginlägg omedelbart eller välj Schemalägg och välj sedan ett datum och ett klockslag när du vill att blogginlägget ska publiceras automatiskt.
- För att slutföra processen väljer du Publicera nu .
Bästa praxis för blogginlägg
Dessa videor är en del av instruktionsvideor för Använda en blogg för ditt företag .
Mer information
- Du har skapat ett inlägg! Nu är det dags att lägga till ett blogginlägg på din webbplats .